The sensor and the RGB LED
The basic idea
Let’s say you want to have a device which can tell you in a simple way if something is dangerous. In the present case, let’s assume there is a very hot stove and you must avoid at all costs to touch it. There are many ways to do it. In my case, as I am playing with Arduino, the best way to see the shields and other components in action is to combine them in a useful way. The current project uses a proximity sensor, made by Sharp, a common anode RGB LED and of course the classical Arduino board plus the breadboard.
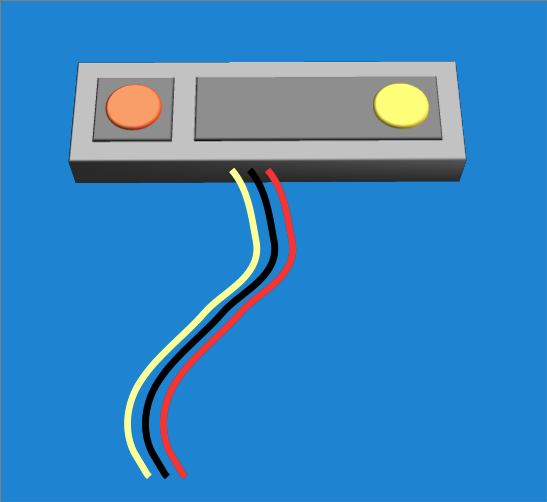
The proximity sensor with the color-coded connectors
The sensor
The proximity sensor is 0A41SK (or GP2Y0A41SK0F). It comes with a connector which is color coded:
- red –> 5Vcc
- black –> GND
- yellow — Analog pin 0

RGB LED in common anode configuration
The LED
The LED is not very hard to use, but mine didn’t lit and I learned about the two possible RGB LED configurations:
- common anode
- common cathode
In case you assume the first type and the LED doesn’t blink at all, you must conclude it is the opposite type. Such was my case. I was afraid the LED was broken, but it functioned normally.

1K resistor
The resistors
I used three 1K resistors. Surprisingly, while people over the internet say that the LED is poorly lit when combined with 1K resistors, in my was it was very bright. Maybe the common anode configuration is favoring this type of LED.
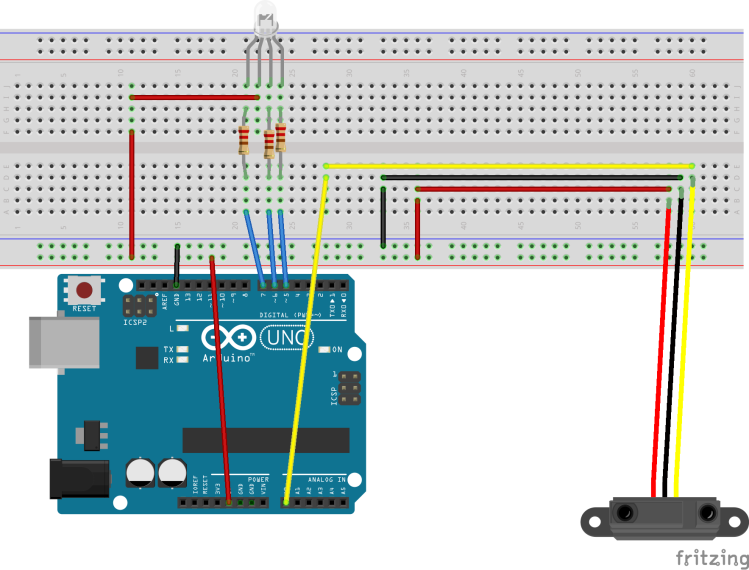
The schematics
The only particular aspect of the circuit was the use of the 5Vcc pin instead of the GND for the RGB led. This requires an inversion of the values on the pins D5, D6, D7, but more of it later. As it can be seen in the picture, there are two distinct circuits that can be tested independently. In fact I used the half-circuits before putting everything together.
The configuration of the LED
Due to the peculiarities of the LED, it is lit when there is a voltage between the 5Vcc pin and the pins D5, D6, D7. In other words, the three individual diodes that make up the LED are lit when the three pins are set on LOW. Similarly, the LED is unlit when the pins are set on HIGH.
The configuration of the sensor
The proximity sensor is connected to the A0 analog pin. AS I am using a WeMos card, it is the only analog pin and I am glad it is available on the board.
Playing with the values
The ADC converter returns a value between 0 and 1023, corresponding to a voltage between 0 and 5Vcc. I used a mathematical formula in order to calculate the voltage. Now, there are many libraries that ca be used, but as I didn’t like the distanced produced, I preferred to do the job myself, so I wrote my own distance calculation function, based on the plot tables provided by Sharp. I will provide the code later, on GitHub.
The LED and the sensor
The main idea is split the range of the sensor in three smaller sub-ranges and associate a color to each one of the:
- 4 – 10 cm blue
- 10 – 20 cm green
- 20-30 cm red
if the object or the hand is at more than 30 cm (or a foot) from the sensor, we consider the stove is not harmful. However, if that is not the case, we have three intervals and three warning colors. Each color is independent from the others.
IF the frequency of the loop is set to say 50 ms, the whole system is very reactive to the movement of a hand.
Remarks
I use a WeMos board. As many have pointed out, the Expressif chip has some current leakages. in my case, the D5 pin, which is SCK and powers the red color, is connected to an on board led. I suspect there are some issues with it. Any way, the red color indicates a capacitor that needs to recharge periodically. Anyway, I am happy with my WeMos board. I have already tested several interesting configurations.
AS a final remark, when I tried to use other pins than D5, the led stayed unlit. It might have an issue with the current available to the board. There are plenty of forums and groups out there and I will dig out this.
